Assemble supports model conditioning by offering several tools to deepen the information available within your model. These tools include importing custom assembly codes, applying unit costs to model elements, editing Revit parameters from within Assemble, Automated Estimating, and the ability to sync all properties or a limited set of properties of the model data from Assemble back into your Revit model. You can find thoroughly detailed instructions to use each of these features from within Assemble Systems’ support site.
The purpose of this section is to illustrate how models can be more thoroughly conditioned by using all of the Assemble tools together to promote an enriching, efficient workflow.
Step 1: Publish Your Model
Publish your model from Revit. Be sure to add any custom type or instance parameters that you may want to utilize at a later time. These custom properties do not need to be edited within Revit. In Assemble, users are allowed to edit type and instance parameters using the Properties Manager (see Step 4).
To learn more about Publishing Your Model, click here.
Step 2: Build Your Custom Assembly Code Tree
Do you have a project-specific assembly code tree? Will you need one? To determine the answers to these questions, contemplate the life cycle of your project.
- Would you like to be able to sort and report by Uniformat code or CSI MasterFormat or OmniClass?
- What format does your existing estimation software use? Would it be helpful to your estimators if the modelers use the same coding scheme?
- Are you working with an Architect, Engineer, General Contractor, or Sub-Contractor and would like to collaborate on a coding structure?
- Would you like to apply costs to your codes for project management and budgeting checks?
- Is this project incorporating Level of Development? Would you like to quickly compare the actual Level of Development to the Required Level of Development?
If you answered yes to any of these questions, it may be in your best interest to take the time to create a project-specific assembly code spreadsheet. Assemble can help get you started by providing templates for common assembly code structures.
To learn more about working with Assembly Code Trees, click here.
Step 3: Import Your Custom Assembly Code Tree into Assemble
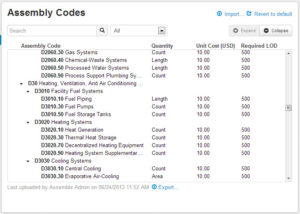
Navigate to the Project Settings for your project and import your custom file. After importing, you will see your custom assembly codes and any unit cost and/or required level of development assigned to the codes.
Step 4: Manage Data in the Assemble Grid
Begin by selecting the element or group of elements to edit under your grouping levels. All editable parameters will be available in the Properties pane. Notice that the Assembly Code field allows you to pick a new code from your custom assembly code tree. Assign your custom codes to all relevant elements in the Grid. Additionally, now would be a good time to edit the other parameters that will later be synced back to the Revit model. Did you create custom parameters? Can they be utilized to make the model information more efficient?
For more information on Working with the Properties Manager.
Step 5: Import Your Custom Assembly Code Tree into Revit
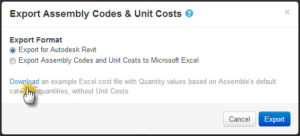
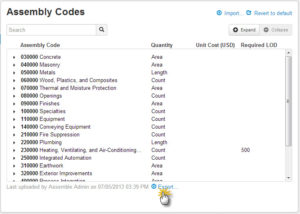
Navigate to the Assembly Codes pane of Project Settings and Export your custom assembly code tree into a file for import into Revit. Import your custom file into the back-end of Revit as the UniformatClassifications file. This allows Revit to match your custom codes with your custom assembly descriptions.
Step 6: Sync to Revit
Open your model in Revit and use Assemble’s Sync feature to bring the edited parameters from Assemble back into the model. With your custom assembly code file in the back-end of Revit, elements with your custom assembly code will now show both the updated assembly code and the assembly code description in Revit. Additionally, type and instance properties edited in Assemble will be applied to the Revit model for thorough conditioning.
To learn more about Syncing Assemble to Revit, click here.
Step 7: Publish Your Model to Assemble
As new iterations of the model are published to Assemble, all of the previously synced data will also be pushed to Assemble, including the assembly codes, descriptions, and other conditioned Identity Data fields. Everything you need will be in Assemble!


